

Key Takeaway: To safely remove tile flooring without damaging the underlying subfloor, you must isolate individual tiles by clearing out the surrounding grout lines first, then lift them using a chisel or pry bar held at a shallow, near-parallel angle. Applying controlled, lateral pressure rather than driving tools straight down prevents the catastrophic gouging or delamination of plywood layers and structural concrete slabs. To prepare the uncovered surface for your new finish material, ensure all high ridges of remaining mortar are scraped down flush, any structural bounce is reinforced with joist screws, and a HEPA-filtered vacuum is continuously deployed to mitigate toxic crystalline silica dust.
To remove tile flooring without wrecking the subfloor, take out the grout first, start at a loose or already-broken tile, keep your chisel or scraper at a shallow angle, and lift tile in small sections instead of driving your tool straight down. Patience is what protects the floor underneath, not brute force. This is for you if you're planning a flooring update, bathroom remodel, or kitchen refresh and you don't want a cosmetic project to snowball into a subfloor repair. And here's the honest part: even with careful work, a little patching is often normal. That's not failure. It's just how old tile comes up.
Before You Start, Know What You're Protecting
A few plain definitions will save you confusion later. The subfloor is the structural layer, usually plywood, OSB, or a concrete slab, that carries the weight of everything above it. Underlayment sits on top of the subfloor to create a smooth surface. Backer board (cement board) is the rigid panel often installed under tile in bathrooms and kitchens. Why does this matter? Whatever goes down next, tile, stone, vinyl, laminate, hardwood, carpet, or terrazzo, only performs if the layer under it is sound. A gouged or spongy subfloor leads to cracked grout, loose tile, and squeaks down the road. So reframe the goal. The point isn't to get all the tile up as fast as possible. Fast tile removal is usually what damages the floor. Slow and controlled is what keeps your subfloor ready for the next flooring surface. Taking a little time here protects both your floor and your money.Safety Gear and Dust Control Before You Break Anything
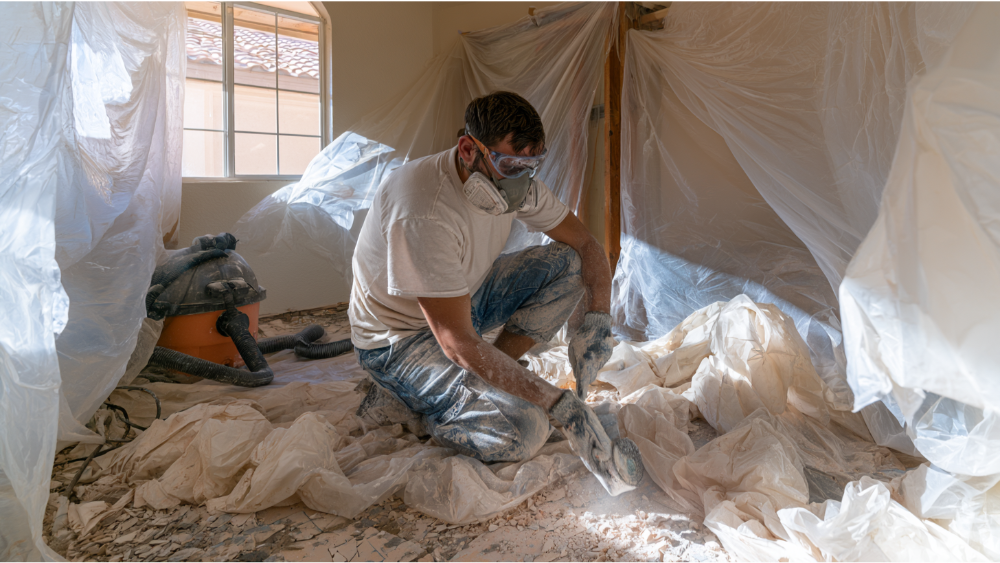 Chipping mortar, thin set, and concrete releases respirable crystalline silica. OSHA describes those particles as at least 100 times smaller than ordinary sand, which is exactly why dry grinding is a real health hazard and not just a mess to sweep up. This is worth taking seriously before the first tile cracks.
Gear up and set up dust control as part of the job:
Chipping mortar, thin set, and concrete releases respirable crystalline silica. OSHA describes those particles as at least 100 times smaller than ordinary sand, which is exactly why dry grinding is a real health hazard and not just a mess to sweep up. This is worth taking seriously before the first tile cracks.
Gear up and set up dust control as part of the job:
- A NIOSH-approved respirator, not a paper dust mask
- Safety goggles or wraparound glasses and sturdy work gloves
- A HEPA-filtered vacuum for cleanup and containment
- Plastic sheeting over doorways and vents to keep dust out of the rest of the house
- Wet methods where feasible; water at the point where dust is created, not just on the surface
What Tools You Need, From Screwdriver to Pry Bar
 You don't need a truckload of demolition gear. Reach for the least aggressive tool that actually works, because tool choice affects both subfloor damage and dust exposure. Some pieces you already own, like a screwdriver for backing out fixture screws; a few you may want to rent for a single project.
Hand tools (best for control):
You don't need a truckload of demolition gear. Reach for the least aggressive tool that actually works, because tool choice affects both subfloor damage and dust exposure. Some pieces you already own, like a screwdriver for backing out fixture screws; a few you may want to rent for a single project.
Hand tools (best for control):
- Grout saw or oscillating tool for grout
- Cold chisel and hammer
- Pry bar to lift tiles without digging into the subfloor
- Floor scraper and a stiff putty knife
- Oscillating multi-tool for tight spots and grout lines
- Rotary hammer with a wide chisel bit, effective on both tile and thin set
- Reciprocating saw if you need to cut through plywood underlayment
- Angle grinder only with proper dust controls
- HEPA vacuum
- Thick demolition bags (thin ones puncture on shards)
- Plastic sheeting
Step-by-Step: The Best Way to Remove Tile Without Gouging the Subfloor
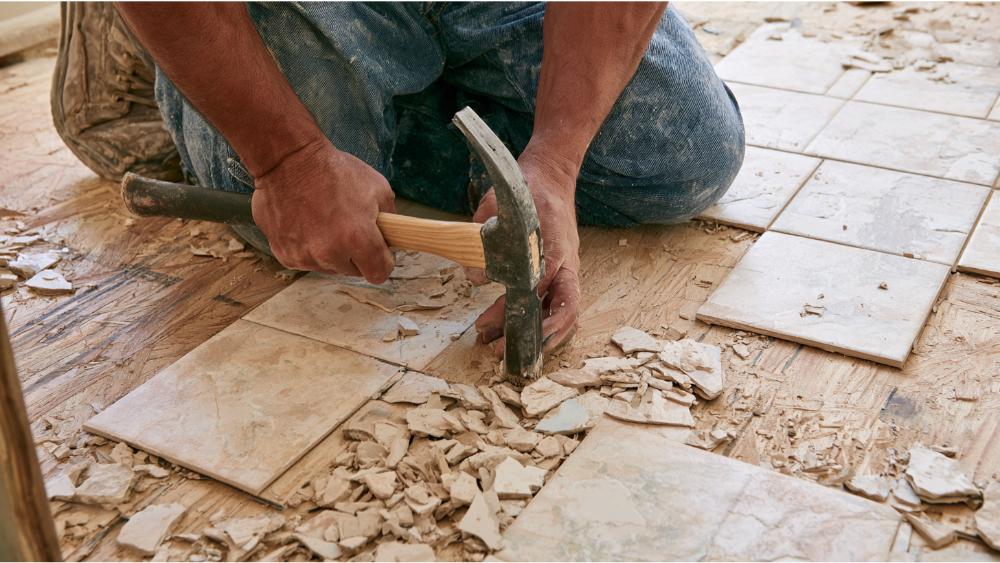 Treat this as a deliberate process, not a demolition sprint. A tile floor comes up cleaner when you follow a set order instead of swinging at it. Here is the sequence for removing tile without wrecking what's underneath.
- Empty the room. Clear furniture and rugs so you have space to work and stage debris.
- Remove baseboards and fixtures carefully. Pry trim off gently, back out any screws holding a toilet or vanity, and take those out in a bathroom instead of tiling around them. Nearby cabinets can stay if the tile doesn't run under them.
- Score or remove the grout first. Cutting the grout around tile edges before you pry reduces the chance of gouging the subfloor.
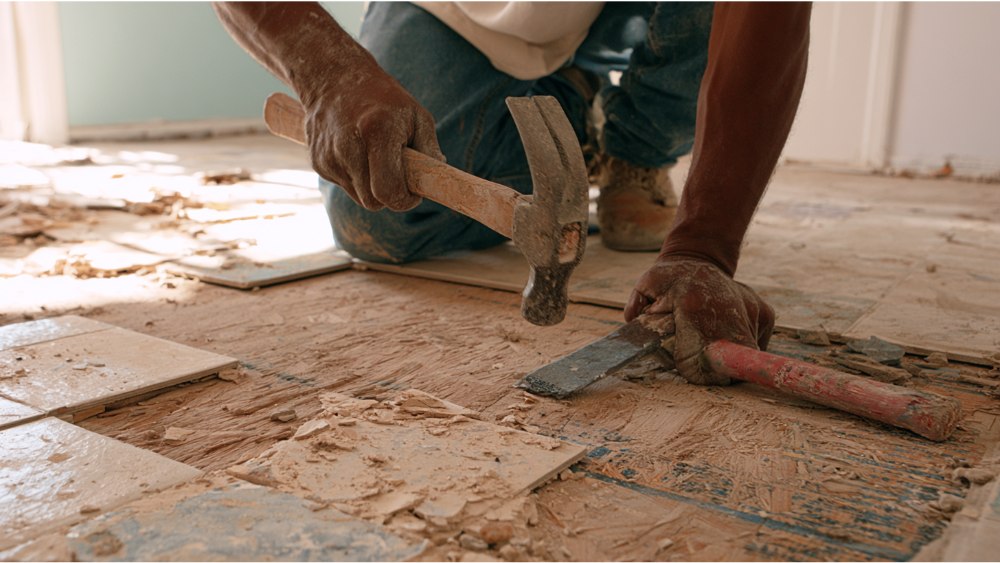
- Find or create a starting point. Begin at a loose or already-cracked tile. If every tile is solid, sacrifice one by breaking it with a hammer and cold chisel to open a gap.
- Pry and chisel at a shallow angle. Slide the pry bar in and keep the blade nearly parallel to the floor. Don't drive it straight down into the plywood or slab.
- Work in small sections. Lift a few tiles at a time. Rushing a big section is where damage happens.
- Scrape thin set or mastic gradually. Once the tile is up, take the adhesive and remaining mortar down in controlled passes rather than grinding hard in one spot.
- Vacuum and inspect often. Clear dust and debris so you can actually see the subfloor and catch problems early.
- Patch, flatten, or replace damaged spots. Address gouges and soft areas before anything new goes down.
Removing Tile From a Concrete Floor vs. Plywood: How the Subfloor Changes the Method
What's under the tile decides how you should approach it. Ceramic tile bonded directly to plywood needs the most care of all, because the same mortar that held it can lift wood fibers as the tile comes free.| What's under the tile | Best approach | Biggest risk |
|---|---|---|
| Concrete slab | Chisel and scrape at a controlled angle; patch divots | Silica dust, gouges, leftover thin set |
| Plywood / OSB | Shallow tools, no downward force, expect some patching | Gouging, delamination, hidden water damage |
| Cement backer board | Remove the tile and the board together if needed | Glued board can tear up plywood |
| Mortar bed | Break the bed in small sections | Heavy debris, structural surprises |
| Radiant heat | Stop and identify the system first | Cutting heating wires or tubes |
| Unknown old layers | Test before you disturb anything | Asbestos, lead, hidden damage |
Is the Subfloor Ready for New Flooring? Inspect Before You Install
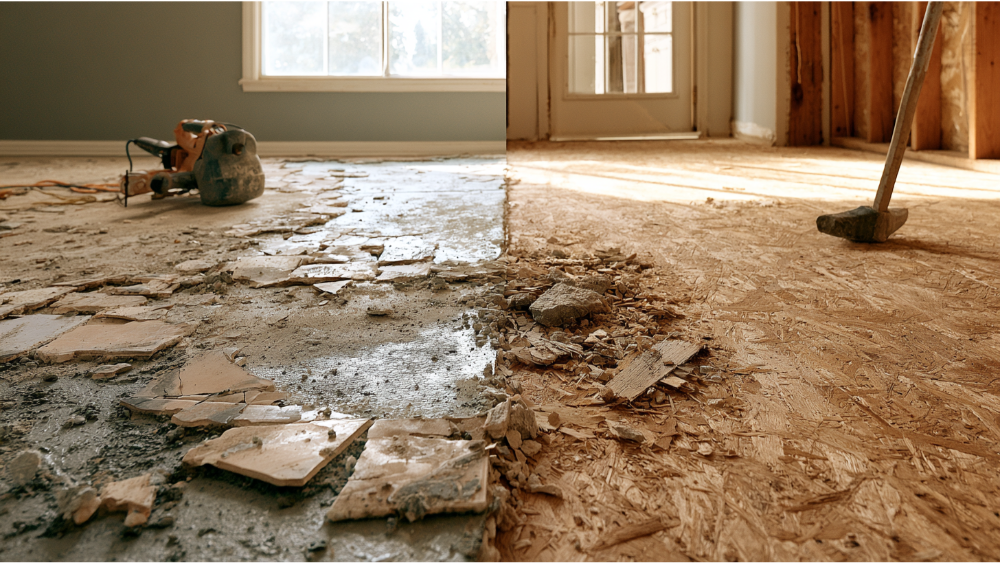 Once the tile and adhesive are up, walk the bare floor and look closely. Some marks are normal, others mean stop.
Normal after removal: light scraper marks, small divots, leftover thin set ridges, and minor patching needs.
Red flags: soft or spongy areas, swollen OSB or plywood, active moisture, large slab cracks, panels that flex underfoot, damaged radiant heat, or any mold-like staining or odor. Squeaking and sagging point to loose fasteners or damaged panels. Reseat them with fresh screws into the joists, or replace the panel if the wood is chewed up. If an old underlayment was stapled down, pull every staple so nothing sits proud of the surface.
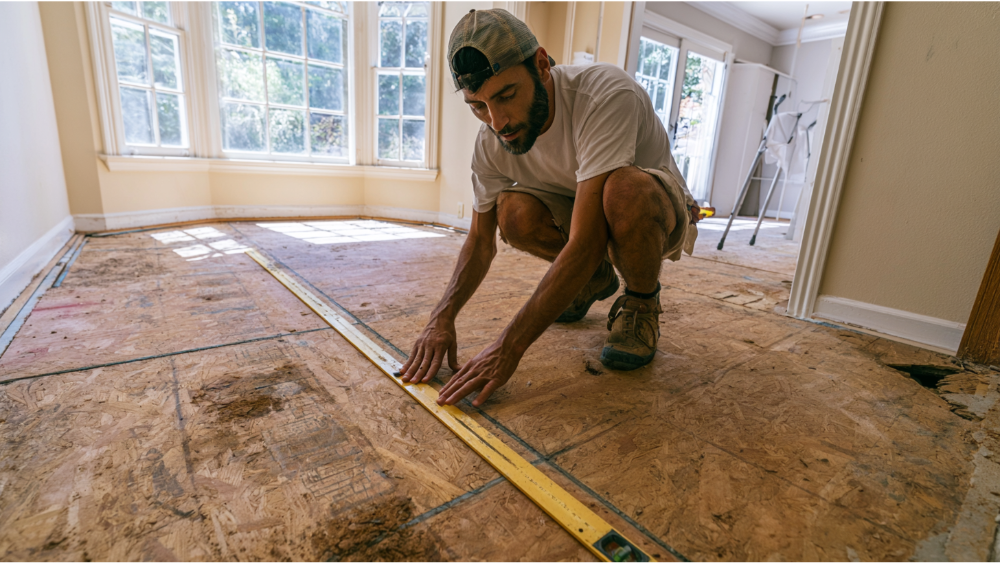
For readiness, the subfloor has to be clean, dry, structurally sound, and flat. The industry standard for tile rigidity is L/360, meaning about a third of an inch of deflection over a 10-foot span. Flatness matters too: for standard tile, the surface generally shouldn't dip more than about a quarter inch over 10 feet. Use a long straightedge to determine whether you have a truly flat surface before committing. That flatness rule applies whether you're installing new tile, laminate, or vinyl, since a wavy base telegraphs through every one of them. Removal is only half the job. Prep is the other half, and it's what makes your new floor last.
One more note if you're switching materials. Laminate and vinyl are floating floors that ride on a thin underlayment, so they forgive far less unevenness than you'd expect. Tile and terrazzo need a rigid, bonded base, and you may need to seal a porous concrete slab before new work goes down. Whatever gets laid next, the prep starts with the smooth surface you just uncovered. A little planning here means you'll be prepared instead of improvising later.
Once the tile and adhesive are up, walk the bare floor and look closely. Some marks are normal, others mean stop.
Normal after removal: light scraper marks, small divots, leftover thin set ridges, and minor patching needs.
Red flags: soft or spongy areas, swollen OSB or plywood, active moisture, large slab cracks, panels that flex underfoot, damaged radiant heat, or any mold-like staining or odor. Squeaking and sagging point to loose fasteners or damaged panels. Reseat them with fresh screws into the joists, or replace the panel if the wood is chewed up. If an old underlayment was stapled down, pull every staple so nothing sits proud of the surface.
For readiness, the subfloor has to be clean, dry, structurally sound, and flat. The industry standard for tile rigidity is L/360, meaning about a third of an inch of deflection over a 10-foot span. Flatness matters too: for standard tile, the surface generally shouldn't dip more than about a quarter inch over 10 feet. Use a long straightedge to determine whether you have a truly flat surface before committing. That flatness rule applies whether you're installing new tile, laminate, or vinyl, since a wavy base telegraphs through every one of them. Removal is only half the job. Prep is the other half, and it's what makes your new floor last.
One more note if you're switching materials. Laminate and vinyl are floating floors that ride on a thin underlayment, so they forgive far less unevenness than you'd expect. Tile and terrazzo need a rigid, bonded base, and you may need to seal a porous concrete slab before new work goes down. Whatever gets laid next, the prep starts with the smooth surface you just uncovered. A little planning here means you'll be prepared instead of improvising later.
A Few Local Checks for Portland and Vancouver-Area Homeowners
Portland generally doesn't require a building permit just to replace interior floor covering. But plumbing or electrical changes can trigger one, like relocating a toilet's connections or hard-wiring anything. If your bathroom remodel touches those systems, or you're moving a wall in the process, check the permit rules first. Older homes deserve extra caution and are more prone to hidden surprises. Oregon DEQ treats suspect flooring and adhesive in residential buildings built before January 1, 2004 as asbestos-containing until testing proves otherwise. Owner-occupants doing their own single-family work are exempt from the survey rule, but hiring the work out changes that. For homes built before 1978, EPA's Renovation, Repair and Painting rule can apply when you disturb painted trim or baseboards. If you're hiring help, verify contractor credentials through the Oregon CCB and BCD before work begins. Kibuk Tile And Construction is based in Vancouver, WA and serves Portland, OR and the surrounding area, so these are the exact checks we walk homeowners through.When to Call a Professional (and How We Can Help)
 Some situations are worth handing off. Stop and call a pro if:
- You suspect asbestos in old flooring or adhesive
- You find water damage or rot
- Tile is bonded directly to plywood and the subfloor is tearing up with it
- There's radiant heat under the tile
- Your bathroom needs plumbing or electrical changes
- The floor has to be prepped for new tile, stone, or terrazzo
- You'd rather have removal and the new installation handled together
Comments